Getting a hex code from a photo takes one click. Getting the right hex code takes a little more care, because JPEG compression and soft edges change pixels before you click. This guide shows where colors go wrong and how to avoid it, and every number in it was measured in a real browser.
By Md. Delwar Hossen · measurements taken August 25, 2026· Last updated
Three steps, and why zoom never changes the color
Load an image, hover to find the pixel you want, click to keep it. What follows is the same three steps with the reasons attached.
Inside your browser tab
Your image
Dropped, pasted, browsed or fetched from a URL.
Decoded once
Decoded by your browser, with the photo's rotation applied so a phone picture is the right way up.
Source canvas
Held at the image's natural resolution and never scaled. Every color reading comes from here.
↓ the same canvas feeds both ↓
The display canvas
what you see
Drawn through a zoom and pan transform, with smoothing switched off past 2× so you can see individual pixels. Nothing is ever sampled from it.
The sampler
what you get
Reads the source canvas at the pixel under your cursor, averaging the square you chose in the Sample control.
Your image only causes a network request if you paste an image URL. A file you drop or paste is decoded in memory and never sent anywhere. To check, open your browser's Network panel while you pick: no request appears.
The fork in the middle answers the most common question. Zooming in to 6,400% does not make the reading more precise, and zooming out does not make it less precise. Zoom only helps you see which pixel you are about to click. The reading always comes from the untouched original.
Five ways to load an image
They all end in the same place. The differences are in what can go wrong.
Drop it
Drag a file anywhere onto the picker. The drop zone highlights while you are over it.
Dropping a second image replaces the first and clears your pins.
Paste it
A screenshot, or an image copied from anywhere. Works from any part of the page.
Ignored while your cursor is in a text box, so pasting a link into the URL field does one thing only.
Browse for it
The ordinary file picker, filtered to images.
On a phone this is where your camera roll lives. Most mobile file pickers also offer the camera itself as a source.
Point at a URL
Paste a link to an image and it is fetched and decoded in your browser.
Only works if the host allows other sites to read its images. Many do not. If it refuses, download the file and drop it in instead.
Borrow the sample
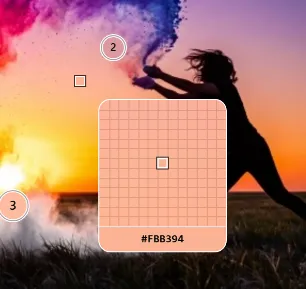
A photograph called Powder at sunset, there so you can try everything before you commit a file.
The pixel grids in the loupe section below were taken from this photo.
Largest file
40 MB
Largest dimensions
No limit
Formats
Anything your browser can decode
Photo orientation
EXIF applied
There is no limit on dimensions, because the image is never resized for sampling. The tool keeps it at full resolution and reads from it directly. One format rule matters: an SVG with no width and height on its root element has no resolution to sample, so the tool refuses it.
Use the loupe to hit the right pixel
Hovering magnifies the 13 × 13 pixels around your cursor. At normal zoom a pixel is much smaller than the cursor tip, so the magnified window shows you which pixel you will get.
Place
Pixel 435, 204 of the sample photograph, magnified about 20 times.
Sample
#E79983
The single pixel under the cursor.
#CE8472
6.64 away from the single-pixel pick.
#B97262
12.92 away from the single-pixel pick.
#A8675D
17.9 away from the single-pixel pick.
Cost of a one-pixel miss
12.14
Averaged samples agree within
11.37
Two subjects meet inside these thirteen pixels. A wider sample averages across the boundary and returns a color that is in neither of them. Here, keep the sample at one pixel and zoom in instead.
Pixel 149, 336 of the sample photograph, magnified about 20 times.
Sample
#877978
The single pixel under the cursor.
#524442
19.53 away from the single-pixel pick.
#554745
18.55 away from the single-pixel pick.
#584948
17.79 away from the single-pixel pick.
Cost of a one-pixel miss
21.44
Averaged samples agree within
1.95
Detail and compression noise, with no single boundary running through it. A one-pixel miss lands somewhere quite different, which is exactly the case a wider sample is for.
Pixel 72, 17 of the sample photograph, magnified about 20 times.
Sample
#283270
The single pixel under the cursor.
#283371
0.36 away from the single-pixel pick.
#283371
0.36 away from the single-pixel pick.
#283371
0.36 away from the single-pixel pick.
Cost of a one-pixel miss
0.31
Averaged samples agree within
0
Nothing is happening in these thirteen pixels. Every sample size lands in the same place and a one-pixel miss costs you nothing, so the narrowest sample is the right one.
Both numbers are CIEDE2000 differences. Under 1, nobody can see the difference. Over 10, they look like different colors.
Reading the three places
Switch between the three places above and watch the two numbers below. Together they give you the rule for the Sample control:
A hard edge. A one-pixel miss is expensive and the averaged samples disagree with each other. That disagreement is the tell: there is a boundary inside the window. Stay at one pixel, zoom in, and move away from the seam.
Fine texture. A one-pixel miss is just as expensive, but this time the averaged samples all land in the same place. Nothing to average across, so widen the sample.
A calm area. A one-pixel miss costs nothing and every sample size agrees. Use the narrowest and move on.
How far each sample size lands from the true color
200 picks at random spots on a noisy field whose true average is #10A99B. Lower is closer.
1 px
6.45
3 × 3
2.07
5 × 5
1.16
11 × 11
0.57
Going from 1 px to 11 × 11 cuts the error from 6.45 to 0.57. That takes you from a visibly wrong color to one nobody can tell apart from the right one. This only works when the pixels around your cursor belong to the same surface. Across an edge, averaging makes the result worse.
What the zoom is doing
An image smaller than the stage is enlarged to fit, but never past eight times, so a tiny favicon does not fill your screen with four colored squares.
You can zoom to 6,400%. Past 2×, smoothing is switched off, so you see the pixel edges instead of a soft gradient.
Scrolling zooms around the pointer, so the pixel under your cursor stays under your cursor.
Panning always leaves at least a quarter of the image on screen, so you cannot lose it off the edge.
Measured in a real browser
Why a picked color can differ from the original
Three things change a color before you click it: JPEG compression, edges that bleed into each other, and anti-aliasing. You can avoid all three. The charts below show how much each one costs.
Turning the JPEG quality up does not save an edge
A drawing of flat brand colors, saved at five quality settings and read back. Bars are the average CIEDE2000 difference from the original, across 51,362 pixels sitting in a flat area and 5,019 sitting on a boundary.
Inside a flat area
On an edge
q95
0.37
6.91
q85
0.6
7.28
q75
0.77
7.58
q60
0.98
8.2
q40
1.2
8.98
Even at the highest quality setting, a pixel on an edge is already 6.91 off, while a pixel in a flat area is only 0.37 off, which nobody can see. Lowering the quality to q40 changes both numbers far less than moving off the edge does. Where you click matters more than the quality setting.
How far a boundary contaminates its neighbor
Two flat colors meeting at a hard edge, saved at q90 and read back one pixel at a time moving away from the seam.
19.04
4.95
0.76
1.53
0.76
0.36
1.41
0.3
0.3
1.1
visible at a glance · 2.3
12345678910
pixels from the boundary
The first pixel across the seam is 19.04 away from the color it should be. It comes back as #648187, a color that appears in neither half of the image. From 3 pixels in, the error drops below the line where a difference is visible at a glance. Saving the file at q60 gave the same distance, so a higher quality setting does not fix this.
Every edge in a lossless file is invented too
A circle drawn on a background, with no compression involved at all.
#24409A
The shape
what you meant to pick
#7A736A
Its edge
34.96 away from the shape
#FBBF24
The background
the other real color
To make a curve look smooth, the renderer blends the shape into the background along its whole outline. That one circle has 77 distinct colors around its rim, and not one of them is in the design. Click the visual middle of an edge and you get #7A736A: a color nobody chose, 34.96 away from the one you were aiming at. No file format prevents this, so the fix is to zoom in far enough to see the pixel grid and click inside the shape.
What to do about it
Ask for the lossless file. When a color has to be exactly right, a PNG or an SVG has no compression artifacts to sample by mistake.
Click inside shapes. Stay a few pixels away from edges, outlines and button rims. Edge pixels are blends that appear nowhere in the design.
Zoom before you click. Past 2×, the pixel grid is visible, and you stop guessing where a boundary is.
Match the sample to the surface. One pixel on flat color and near edges, wider on noise and texture.
How these numbers were produced
Every figure on this page comes from scripts/measure-color-drift.mjs, which runs in Chromium 151.0.7922.34. It was last run on August 25, 2026. The JPEG encoding and decoding are the browser's own, so the results show what a real browser does. Each difference is a CIEDE2000 value computed by the same function the tool uses. The script draws its own test images; the pixel grids come from the bundled sample photo.
Keyboard and gestures
Arrow keys are the most reliable way to hit one specific pixel. Click the image once to give it focus, then the keys below work.
On the image
Arrow keys
Move the cursor one pixel
ShiftArrow keys
Move ten pixels
Enter
Pin the color under the cursor
Space
Hold, then drag to pan
+
Zoom in
-
Zoom out
0
Fit the whole image
These shortcuts work once an image is loaded. An empty canvas has no pixels to move to.
Pointer and touch
Click
Pick a color and pin it
Scroll
Zoom around the pointer
Middle-drag
Pan without holding Space
One finger
Drag to pan, tap to pick
Two fingers
Pinch to zoom
A click that drags more than four pixels is treated as a pan and picks nothing, so a slightly shaky hand never drops a pin you did not want.
One shortcut works anywhere on the page, not only on the image: Ctrl + V loads the image on your clipboard, or follows an image link if that is what you copied. It does nothing while you are typing in a text box.
From one pixel to a palette
One hex code is rarely enough. The four tabs beside the image turn your pick into palettes, harmonies and shade ramps you can build with.
Image palette
The colors the photo is made of, with the share of pixels each one covers. The tool shrinks the image to 160 pixels on its long edge, splits it with median cut, then refines the groups with weighted k-means clustering in CIE LAB, so the groups follow how people see color.
Fully transparent areas are left out entirely, so a logo on a transparent background gives you the logo's colors and not a large share of nothing.
My picks
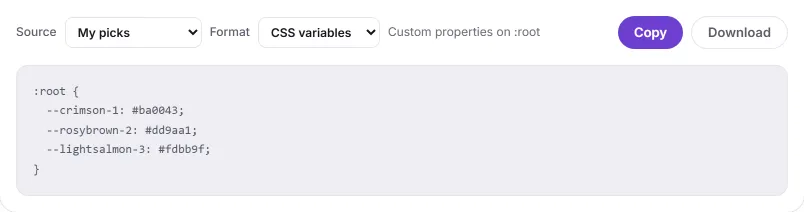
Every click leaves a numbered pin on the image. Rename them, reorder them, drop the ones you do not want. The order you leave them in is the order they come out in when you export, and the names become the variable names.
Pins belong to the image. Loading a different one clears them, so export first if you want to keep them.
Harmonies
Six schemes built by rotating the hue of your pick. The rotation happens in OKLCH, not HSL. In HSL the yellows come out muddy and the blues come out loud, because equal steps in HSL do not look equal.
Pick a color that is almost gray and every scheme lands on the same shade. The panel shows a note when that happens.
Shades and tints
Tints toward white, shades toward black and tones toward gray, ten steps each. The fourth option is the one you want for an interface: a 50 to 950 ramp at fixed perceptual lightnesses, which is the shape a design system expects.
Hovering updates the swatch and all nine color codes live. The harmonies and ramps update only when you click, so they do not flicker while you move the mouse. For 34 formats, a contrast checker, a color-blindness simulator and a gamut plot, paste the color into the color picker.
Export your colors
You can export any set of colors you can see. Choose what to export and the format.
What to export
My picks
The pins you placed, in your order, with your names.
Image palette
The dominant colors the extractor found.
Current harmony
Every member of all six schemes.
Current scale
Whichever ramp you have open.
In what shape
CSS variables
Custom properties on :root
Tailwind v4
An @theme block, drop into your CSS
SCSS
Variables plus a $palette map
JSON
Every notation for every swatch
Plain HEX
One code per line
SVG swatches
A labeled swatch sheet
Copy it or download it. There is no PNG or JPEG export. The SVG swatch sheet is the closest option, and you can still edit it.
The link is the color
Every color you commit is written into the address bar. Bookmark it, send it to someone, or paste it into a ticket, and it opens on that exact color. Nothing else about your session travels with it.
Recent colors
The last two dozen colors you picked are kept on your own device and are still there tomorrow. They never leave it, and clearing them is one button.
Four worked examples
Four common jobs, with the full route through both tools.
Match a brand color from a logo
1Use the PNG or SVG if you have one. A JPEG of a logo almost always has damaged edges.
2Zoom in until you can see the pixel grid, then move several pixels inside the shape, away from any outline.
3Keep the sample at 1 px. The color is already flat, so averaging can only drag in something else.
4Pick again a few pixels away. If both picks give the same HEX, you are on flat color and the value is reliable.
1Load the photo and read the Image palette tab. Those are the colors the picture is made of, with the share of pixels each one covers.
2Click the one you want to build on. That becomes the current color.
3Open Shades and tints and switch to the 50 to 950 ramp, which is fitted in OKLCH so the steps look evenly spaced rather than merely being evenly numbered.
4Export the scale as Tailwind v4 and paste the @theme block into your stylesheet.
Every message the picker can show you, what it means, and what to do next.
That image is too large.Try one under 40 MB.
The limit is on file size, not dimensions. A large photograph is fine; a 60 MB layered export is not. Save a flattened copy.
That file is not an image.PNG, JPEG, WebP, AVIF, GIF, BMP and SVG all work.
Usually a PDF, a design file or a ZIP. Export a raster or vector image from it first.
That image has no fixed size.Vector files need a width and height to sample from.
An SVG without width and height on its root element has no natural resolution to sample. Add them, or open it and export a PNG.
That image could not be fetched.The site hosting it blocks other sites from reading its images. Download it and drop the file here instead.
This is the browser's rule, and no web page can get around it. Download the file and drop it in.
Only http and https image URLs are supported.
You have pasted something that is not a web address, or a data: or file: URL. Use the browse button for a local file.
Your browser blocked clipboard access
Copying needs permission, which some browsers withhold in private windows or when the page is not focused. Click the page and try again, or select the value and copy it by hand.
Common questions
Why does Ctrl + V not paste my image?
The paste shortcut is ignored while your cursor is in a text box, so pasting a link into the URL field does not also load your clipboard as an image. Click an empty part of the page, then paste.
Does zooming in change the color I get?
No. Zooming and panning only change the view. Every reading comes from a hidden copy of the image at full resolution, so the same pixel gives the same value at 100% and at 6,400%. Zoom only to see which pixel you are about to click.
Which sample size should I use?
Start at 1 px. Widen it only when the pixels around your cursor belong to the same surface but are noisy. On a noisy test area, 11 × 11 landed 0.57 from the true color, while 1 px landed 6.45 away. Near an edge, stay at 1 px: a wider sample averages across the boundary and returns a color that is on neither side.
Why does the HEX I picked not match the brand color?
Usually one of three things. You clicked within a few pixels of an edge, where compression smears two colors together: on a measured hard edge, the first pixel across is off by 19.04, and the color is only accurate again 3 pixels in. You clicked an anti-aliased edge, which blends the shape with its background. Or the image is a screenshot of a screenshot. Zoom in, move a few pixels into the shape and pick again.
How do I move exactly one pixel?
Click the image once to give it focus, then use the arrow keys. Each press moves the cursor one pixel, and Shift with an arrow moves ten. Press Enter to pin the color under the cursor.
Why will an image URL not load when the downloaded file works?
The site hosting that image does not let other sites read its pixels. Browsers enforce this and no web page can get around it, so the tool shows an error instead. Download the image and drop the file in.
Do my picks survive a page reload?
Your current color does, because it lives in the address bar and you can bookmark or share that link. Recently used colors are kept on your own device and survive too. The pins on the image do not survive a reload, and loading a new image also clears them, so export or copy anything you want to keep before you move on.
How do I pick a color from a PDF?
Open the PDF, zoom so the color fills a good part of the screen, take a screenshot and paste it here with Ctrl + V (Cmd + V on a Mac). Then click the pixel. A PNG screenshot keeps the colors as your screen shows them, which is what you want for web work.
How do I pick a color from an image on my phone?
Open this page in your phone's browser, tap Choose image to pick a photo from your gallery or take a new one, then pinch to zoom and tap the pixel you want. The codes appear below the image, and each one copies with a tap.
Try it on the sample photo
Open the picker and try it on the sample photograph. Nothing you load leaves your device, and there is nothing to sign up for.